Meta Quest 3 & 3S - Top 10 Settings You Need To Change
If you're the proud new owner of the Meta Quest 3 or Meta Quest 3S, then it's essential to optimize the settings to enhance your overall experience. In this guide, we will walk you through the top 10 settings adjustments that you need to make to get the most out of your Meta Quest device.
1. Check for Software Updates
Make sure your Meta Quest is running on the latest software update to ensure optimal performance. Navigate to Settings > System > General and check for any available software updates. It's crucial to stay up to date with the latest patches and improvements released by Meta.
2. Adjust IPD (Interpupillary Distance)
Download an app like 'Eye Measure' (for iPhone) or 'GlassesOn App' (for Android) to measure the distance between your eyes. Use this information to adjust the lens distance on your Meta Quest for a clearer and more comfortable viewing experience.
3. Secure Your Device
Protect your personal information by setting up a passcode in the Passcode & Security section of the settings. This step is crucial if you plan to access social media or sensitive information on your Meta Quest.
4. Optimize Audio Settings
Pair your Meta Quest with Bluetooth audio devices for a personalized audio experience. Keep in mind that there may be latency issues when using Bluetooth for audio, so consider alternative solutions like USB-C to Bluetooth adapters or headphones that support USB-C audio.
5. Customize Window Layout
Learn how to maximize and resize windows on your Meta Quest for a personalized multitasking experience. Some windows, like the web browser, can be enlarged, while others, like the settings page, cannot. Experiment with different layouts to suit your preferences.

6. Utilize Theatre Mode
Enhance your viewing experience by using Theatre Mode when watching videos or movies on your Meta Quest. Explore the options available in Theatre Mode, such as curving the screen for a panoramic display or enabling 3D mode for compatible content.
7. Pair with PC via Mixed Reality Link
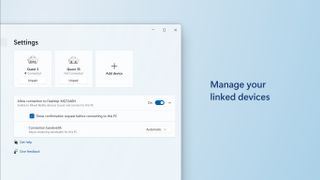
Connect your Meta Quest to your PC using the Microsoft Mixed Reality Link feature. Follow the steps to enable pairing, download the necessary software, and enjoy a multi-screen workstation experience with your Meta Quest acting as a display.
8. Customize Universal Menu
Personalize your Universal Menu (taskbar) by choosing which apps to permanently dock for easy access. Learn how to unpin and pin apps to the taskbar to streamline your navigation on the Meta Quest.
9. Enable Swipe Typing
Save time typing on your Meta Quest by enabling swipe typing in the virtual keyboard settings. Hold the trigger down on the first letter of a word and swipe between letters to quickly input text.

10. Optimize Camera Settings
Adjust the camera settings on your Meta Quest for optimal recording quality. Set stabilization, aspect ratio, frame rates, and bitrate according to your preferences for capturing photos and videos.
By following these 10 settings adjustments, you can customize your Meta Quest 3 or 3S to suit your preferences and enhance your overall VR experience. Stay tuned for more tips and tricks to make the most out of your Meta Quest device!


